With 55,000 miles on the clock, my BMW service pack has ended so no more free servicing for me. BMW charges £462 for a service + £51 for a brake fluid flush = £513. Independent BMW specialists charge a little less but not by much.
If you have some spanner twirling skills then you can save yourself about £300 if you buy the parts and carry out the service work yourself. The bonus is you know the jobs have been done properly because you did them.
The BMW Technical Service manual is not yet available to the likes of us but I found the jobs pretty straightforward when I had worked out how to set about each. Next time I’ll do the jobs in half the time. I hope my notes will inspire some of you to have a go on your car.
This is how I did it on my 2012 640d. All the part numbers I quote are for my car. Other 6 series models will be very similar. Look up part numbers for your car here;
http://www.realoem.com/bmw/enUS/select
So what is covered by a full service?
1. Engine air filter replacement
2. Pollen filters replacement (or micro filters as BMW calls them)
3. Engine oil and filter replacement
4. Brake fluid flush
5. Fuel filter replacement
6. Reset Vehicle Status in iDrive for Oil and Brake Fluid
7. Update your BMW Service log in the glovebox document wallet
1. Engine Air filter Replacement
The BMW part number is 13718518111 and costs £60.60. This is just a paper filter so instead I decided on a K&N filter which will last for the life of the car priced at £60.41 on eBay.
a) First to gain access, remove the large plastic engine cover by simply pulling sharply upwards from the front and then the rear. There are 4 poppers holding it in place
b) You will now see the air filter housing on the right hand of the engine set vertically
c) Unclip (2 clips) and hinge from the base the cover outwards so you can slide the old filter out from the top
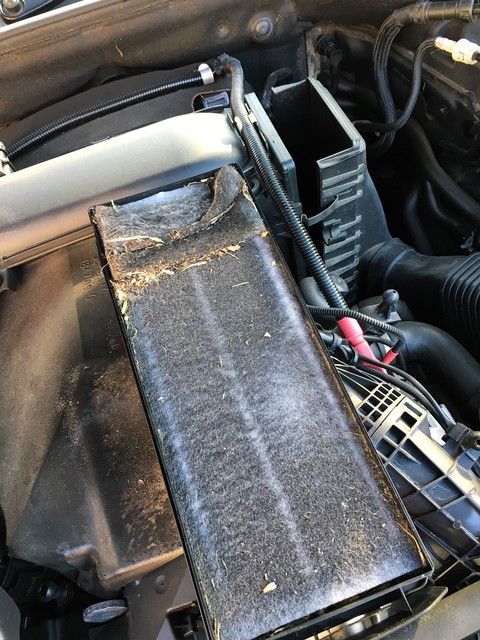
d) I found quite a lot of debris in the intake side of the filter but the engine side was still clean so the filter was doing its job well
e) Vacuum out any debris left in the bottom of the air filter housing
f) Slide in the new filter and clip the housing back into place
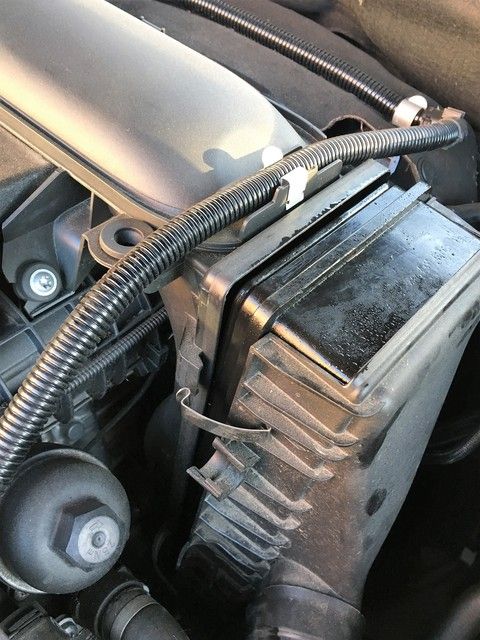
(Note the oil filter cap just in front of the air filter. We’ll be back to that later)
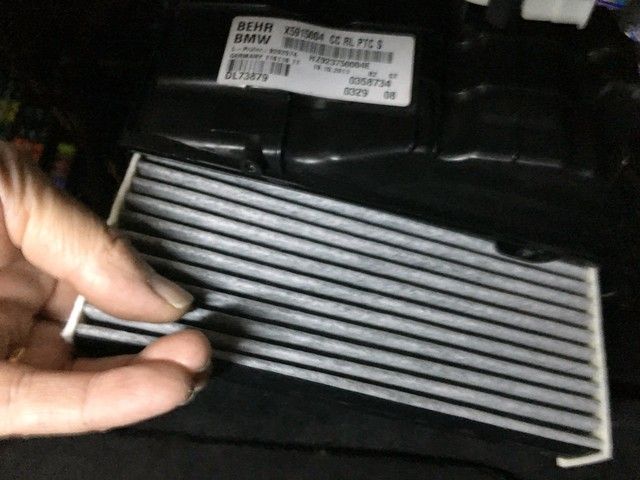
2. Pollen (Micro filters) Replacement
The BMW part number for the pair is 64119272641 and costs a whopping £83.92. For a pair of paper filters, that is ridiculous, so I bought a Mahle set on eBay for just £24.95.
It took me a while to find them in the car and after I had, I found instructions on the inside of the box in which the new filters were packed. I mean actually printed on the inside face of the cardboard! The filters are accessed from the passenger side foot well.
a) Get your head down into the passenger foot well and locate and undo 2 torx screws that hold the top panel in place. A 3rd screw which is through the carpet to the transmission tunnel must also be removed. Unclip and lift away the panel
b) Unplug the glovebox light plug and the wire clip so you can move the panel completely out of the way
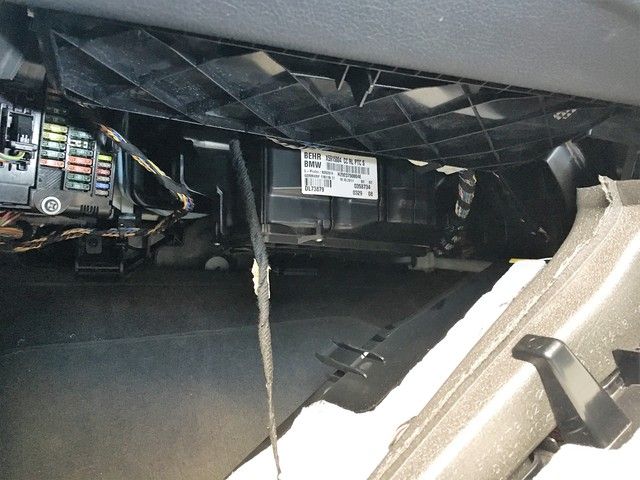
c) You will now see the filter housing. 4 torx screws hold the bottom plastic plate in place. Remove those and the bottom plate
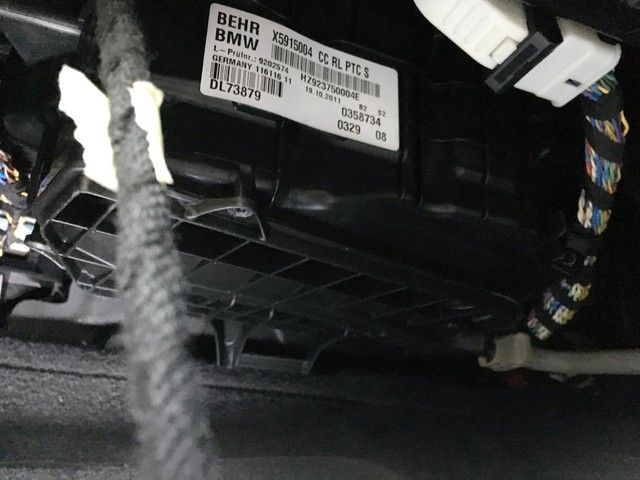
d) Pull out the two old filters. They are side by side in 2 vertical slots. Note the direction arrow on each filter for airflow towards the cabin
e) Slide in the 2 new filters ensuring the airflow arrows point towards the cabin
f) Refit the bottom plastic plate and the foot well panel
g) You might also want to clean the engine side blower filter. Remove 3 pop pins from the scuttle panel and lift it away
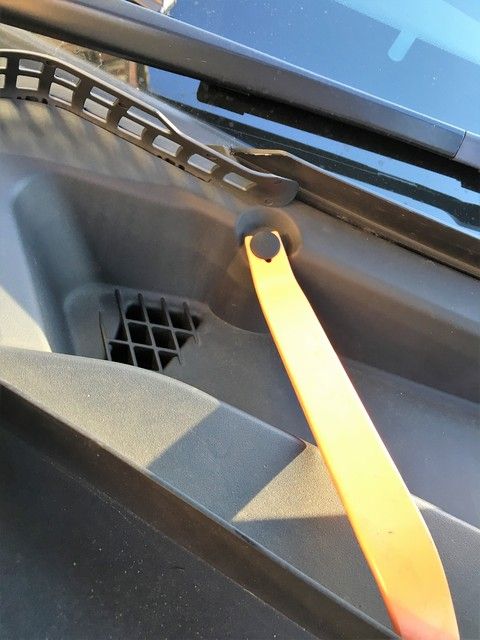
Remove 4 torx screws holding this plastic box in place.
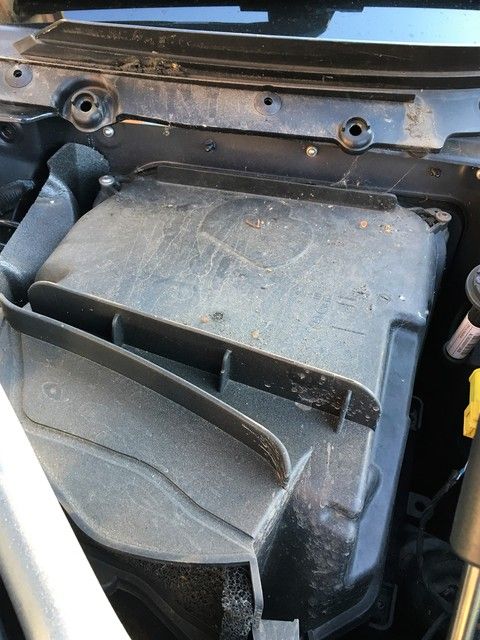
Undo the brace bar so you can remove the box. There is a rough spongy filter in the leading edge in this box which is worth giving a quick vacuum. Mine had some debris in it. Then refit everything
3. Engine Oil and Filter Replacement
There is a bewildering range of oil brands to choose from but it must be fully synthetic 5W-30 with the code BMW Longlife 04. I went for 8 litres of Mobil 1 from Opie oils with a Mahle oil filter, sump washer and filter cap seal thrown in for £76.50. The BMW part number for the filter is 11428507683 and the Mahle filter part number is OX404D. Opie initially sent me the wrong filter but were quick to send a replacement so check first before dropping your oil.
Opie state on their website that you need 8 litres. Opie is wrong. I weighed the oil dropped from my engine. It weighed 5.50kg which corresponds to a fraction over 6.10 litres of oil.
a) Run the car until it has warmed a little. No need for it to be at normal operating temperature. It just needs to be warm enough to reduce the oil viscosity so it drains more easily.
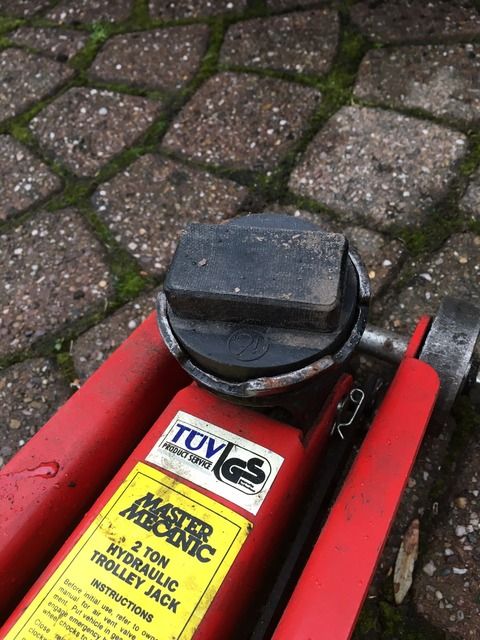
b) If you are not fortunate enough to have a car lift or a pit, raise the front of the car. Drive-up ramps or a pair of jacks will do it. If you are using drive-up ramps then in order to clear the front spoiler you may need to make the angle of approach shallower using blocks of wood. If you are using a pair of trolley jacks then you will probably find the sills are too low to get your jack underneath so first drive the front wheels onto some blocks of wood and chock the rear wheels. This will give you sufficient height to get your trolley jacks under the jacking points.
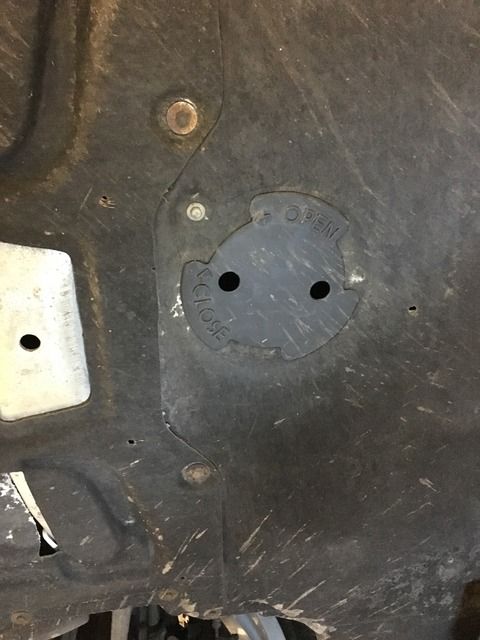
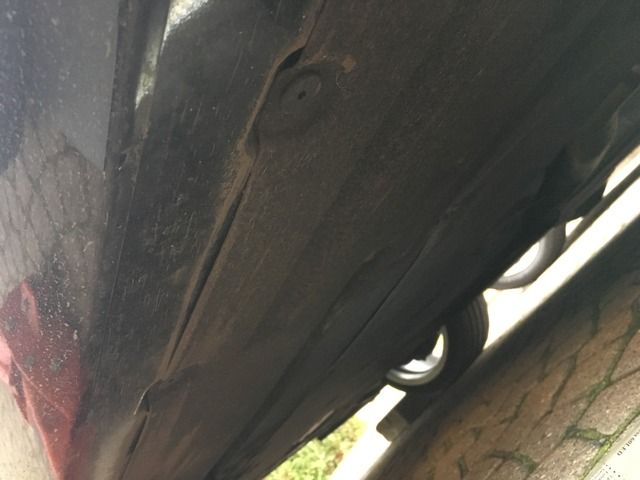
c) The sump plug is behind a hatch in the undercarriage engine cover. Undo and remove the locking screw to the side (took me a while to work this out) and then turn the hatch in the ‘open’ direction to remove it completely
d) Use a 17 mm socket to undo the sump plug and catch the oil in a container
e) While that is draining, open the bonnet and remove the engine cover. Four poppers, so just pull upwards from the front and then the rear.
f) Using a 27mm socket or spanner, unscrew the filter housing cap on the right side of the engine as you look at it. The paper filter will come out with it.
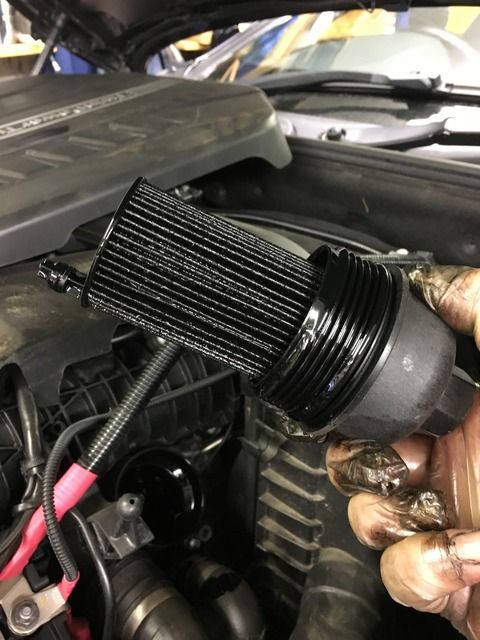
g) Pull the old filter and the rubber sealing ring off the filter cap and discard.
h) Insert the new filter into the engine. There is a sort of nipple thing on the end of the filter which must be lined up with a hole in the filter housing of the engine

i) Fit the new rubber sealing ring to the filter cap and then push the cap onto the new filter and screw it down onto the filter housing
j) Refit the sump plug using a new copper washer and the sump hatch in the undercarriage engine cover
k) The filler cap is left front on the engine. You can’t miss it. Open it and pour in 6.1 litres of oil.
l) Refit the top engine cover
m) Reset the oil service in iDrive (see instructions at the end). It should now show the next oil change is due in 19,000 miles but I will be doing my next one in 9,500 miles
n) Run the engine and check oil level through the iDrive. Then switch off, leave a while and then check the oil level using the dipstick which is just behind the engine air filter. My iDrive showed oil at max but my dipstick was showing ½ way between min and max which surprised me. However, after a short drive, the iDrive also changed to indicate ½ way between min and max and so I tipped in another 200ml of oil. In other words the total capacity for an oil change is 6.30 litres.
4. Brake Fluid Flush
When you re-set the iDrive brake fluid indicator it shows brake fluid should be changed every 2 years which seems reasonable. Looking at my BMW service book, it appears that in 4½ years, the brake fluid has never been changed, though it did still look pretty clear.
I have no idea of the system capacity but guessed a 1 litre bottle of Dot 4 which costs about £13 would be sufficient.
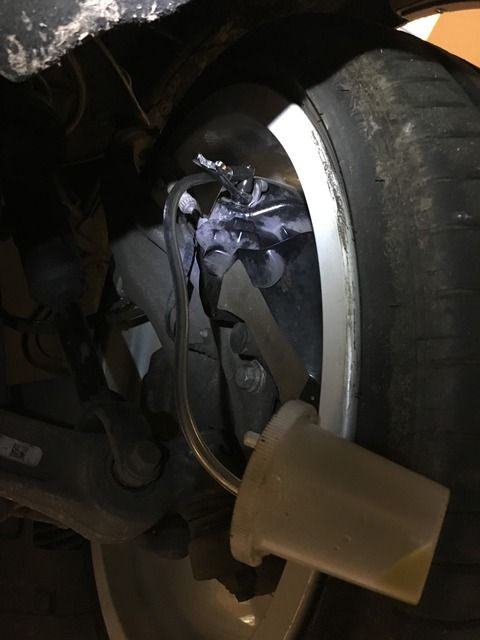
If you still have the car up on a lift, on ramps or you have a pit then you can access the front calliper bleed nipples without removing the wheels but for the rear, you will need to remove the wheels. Otherwise you will have to jack up each corner and remove each wheel in turn.
I have use both vacuum and pressure bleeding kits in the past but they are never as successful as the old fashioned way of using a helper in the driver’s seal pushing and holding down the brake pedal as you open and close each bleed nipple.
It is usual to start at the furthest point from the master cylinder and work forward. So I started at driver side rear, then passenger rear, passenger front and finally driver front.
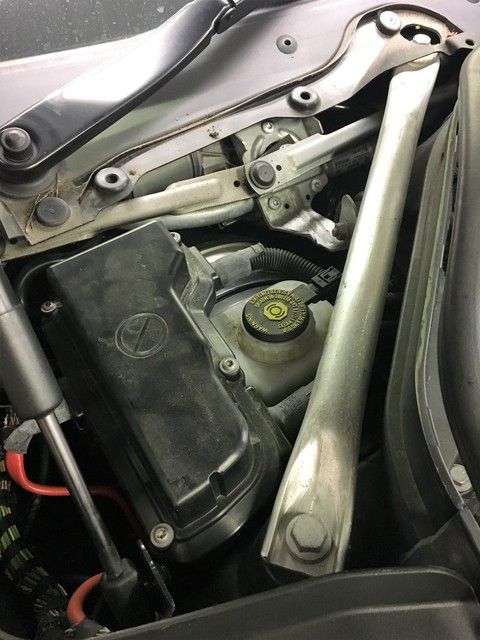
a) Lift the bonnet and remove the driver side scuttle panel. Just 3 pins. Prise up the centre and the clips will lift out. Lift away the scuttle and locate the master cylinder brake fluid reservoir
b) Unscrew the brake reservoir cap and wedge some rags around the sides of the reservoir in case of spillage
c) Using a syringe, suck out all the old fluid in the reservoir. You should draw about 250ml.
d) Top it back up to the brim with fresh DOT4 fluid
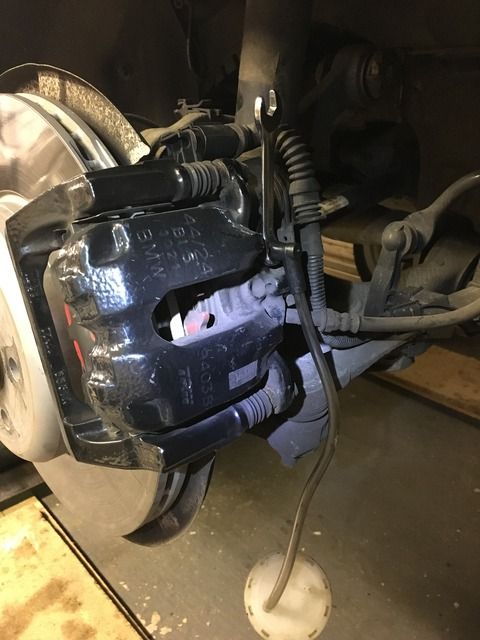
e) Starting at the rear driver side calliper, flick off the bleed nipple dust cap and using a 10mm ring spanner, crack open the bleed nipple a little just to make sure you can, then nip it back up lightly
f) Next fit your bleed kit hose and collector container to the nipple, crack open the nipple again 1/8 to a ¼ turn and ask your helper to press the brake pedal to the floor, fluid will rush through the tube into your container. Nip up the nipple and ask your helper to lift off the brake pedal. Crack open the bleed nipple again, press down brake pedal and keep going. I drew off about 200 ml. When complete, re-fit the dust cap and make sure the pedal is firm again.
g) Top up the reservoir and move onto rear passenger. Repeat for front passenger and driver side. Remember to top up the reservoir after each calliper bleed and made sure the pedal is firm after you have done each.
While you are there, take a good look at your brake pads and discs. iDrive suggested 37,000 and 39,000 miles for a set but I am not convinced this is realistic. So check them yourself and if you do need to change them, then brakes and discs front and rear are priced at a whopping £1,307 supplied and fitted by BMW. However, you can buy the parts and do it yourself for £530. Here is my earlier post from last month showing how I did it.
http://www.6post.com/forums/showthread.php?t=1275069
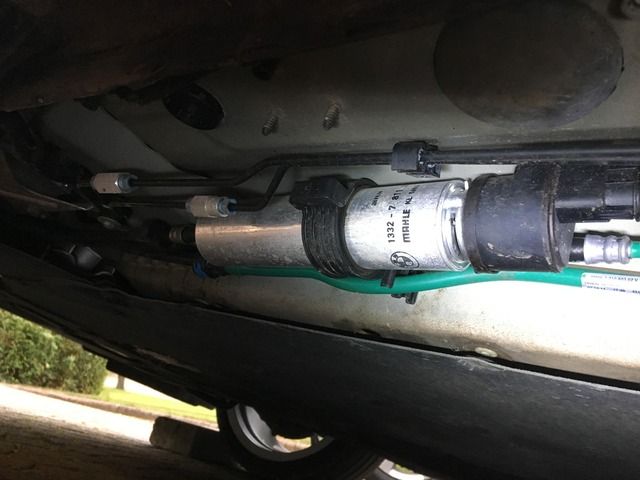
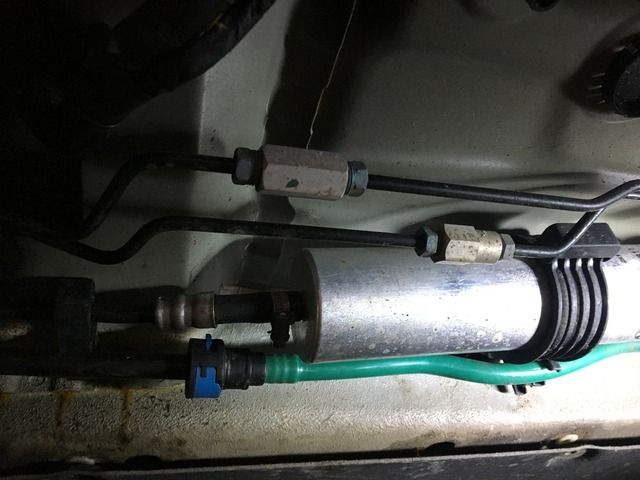
5. Fuel Filter Replacement
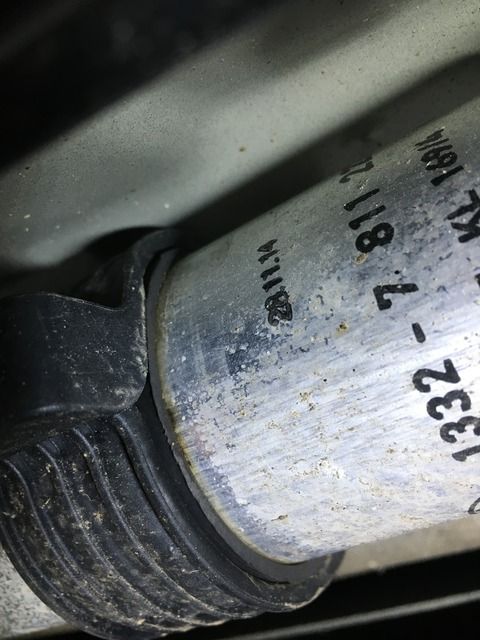
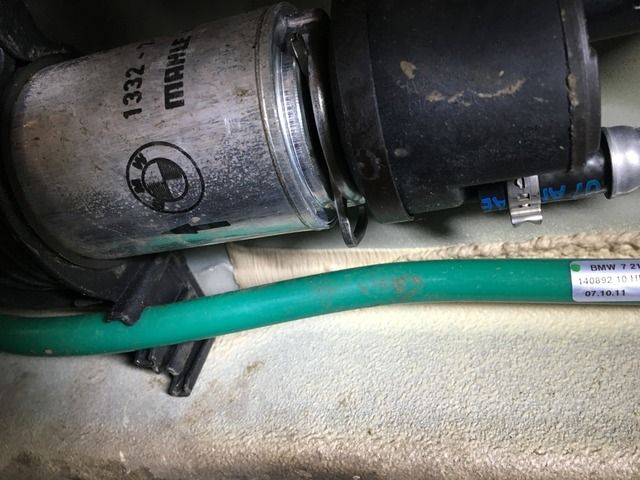
The BMW part number is 13327811227 and costs £49.41. I found a genuine BMW Mahle filter on eBay for £32.99. The filter is a shiny tube about 230mm long. I do not know the recommended replacement interval but would guess every 30,000 miles is reasonable. According to my service log, BMW changed mine in March 2015 at 37,000 miles (18,000 miles ago). Each filter has a manufactured date on its case so when I got the panel off, I could see mine was manufactured on 28th Nov 2014 which means BMW did in fact replace my filter at the last 37,000 service so I left it fitted, saving my new one for next time time.
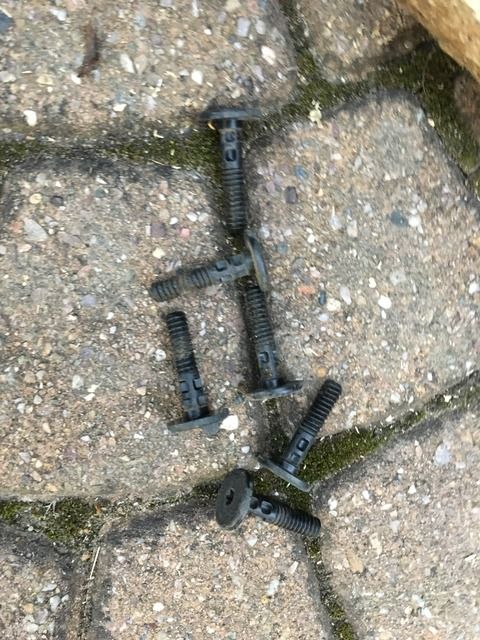
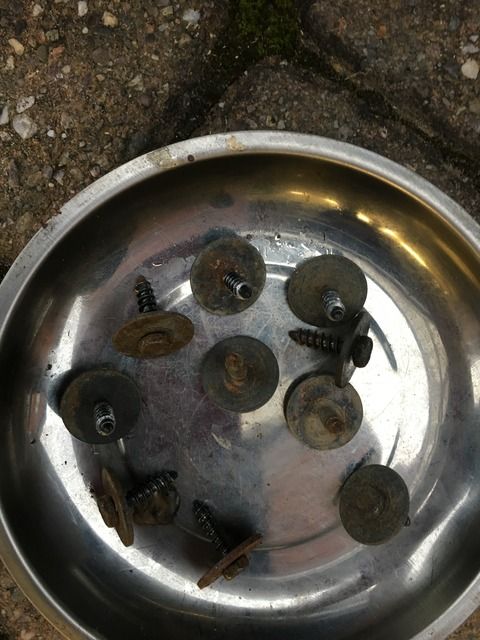
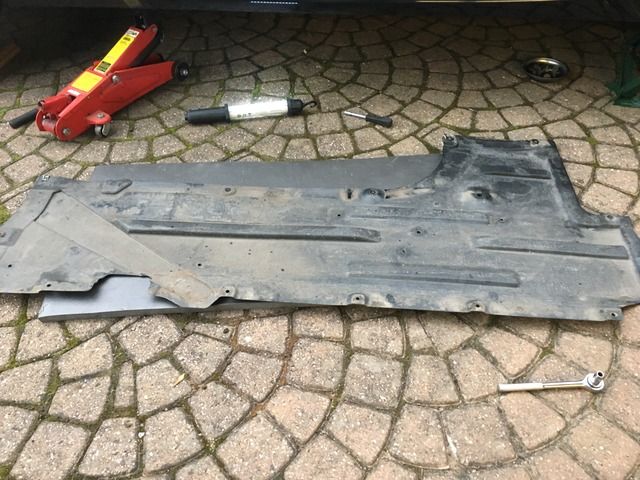
The fuel filter is tricky to access. It is fitted near to the sill under the floor pan on the left hand side of the car (passenger side in the UK) directly beneath the foot well. The only way to access it is to jack up the side of the car so you can remove ten 8mm screws and 6 T30 plastic screws which hold the undercarriage cover in place
a) Drive the left front and rear wheels (passenger side in the UK) up onto some blocks of wood and chock both wheels on the other side of the car (driver side in the UK). Now you have enough room to get a pair of jacks under the left hand jacking points front and rear to jack up the car so you can see and reach under the car. I use a puck to protect the jacking points on the car. You need a little more height on the front. It’s perfectly safe; the wheels stay on and you are only reaching under the car not lying under it

b) Start undoing the screws securing the undercarriage panels using an 8mm socket and a T30 and pull it out.
c) Check the date on your filter. Mine was clearly changed at the last service (see the date stamp for manufacture 281114) so I left it in place
d) If you do need to replace it, pull the green pipe out of the way so you can access the bracket screw and remove it. Then pull out the pin on the right hand side and undo the hose clamp on the left to disconnect and remove the old filter.
e) Fit the new filter, tighten the clamps and insert the pin. Then refit the panel and screws using a little ACF-50 or WD-40 on the threads to make them easier to re-fit
6. Reset your Vehicle Information Service Data in the iDrive
a) Turn the ignition key to position “ON” without starting the engine
b) Press and hold the instrument cluster button on bottom left of tach
c) Display will change and show Service symbol
d) Press same button again to scroll to the relevant Service menu
e) When you reach the engine oil option, press and hold until option appears to reset interval
f) Press and hold the button again to confirm
g) Carry out b) to f) again for Brake Fluid
h) Carry out b) to f) again for Vehicle Check
When you next pass an MOT using a non-BMW garage you can reset emissions inspection and vehicle inspection in iDrive by just highlighting the date using the dial and moving it forward 12 months.
7. Don’t forget to tick the relevant boxes, enter the date and mileage in your BMW service book to show you have completed the service and give yourself a pat on the back.
Some may say DIY servicing lowers the value of your car. Maybe. But I would rather buy a 2nd hand car from an enthusiastic, capable owner who has done his own routine servicing and has all the parts receipts show, than a car with BMW stamps in the service book. Technicians can be very sloppy. Last time mine was in a for a BMW service, the Technician forgot to re-fit the coolant cap. It took 500 miles but the engine eventually boiled when I was 300 miles from home. Thankfully, I topped up with water, got home and took it back to BMW to check out. All was fine.