| 08-31-2016, 02:52 PM | #1 |
|
Private First Class
 29
Rep 133
Posts |
F13 Mirror Housing Swap
Due to a small but noticeable deep scuff in the gloss black trim on the lower part of the mirror, I decided to purchase a new trim and set about fitting it. I had a quick look online and couldn't find any pics or guides on how to do it, so thought I'd snap a few pics and put a few notes here for anyone that may need to do the same.
This is the item I replaced. This is the after shot  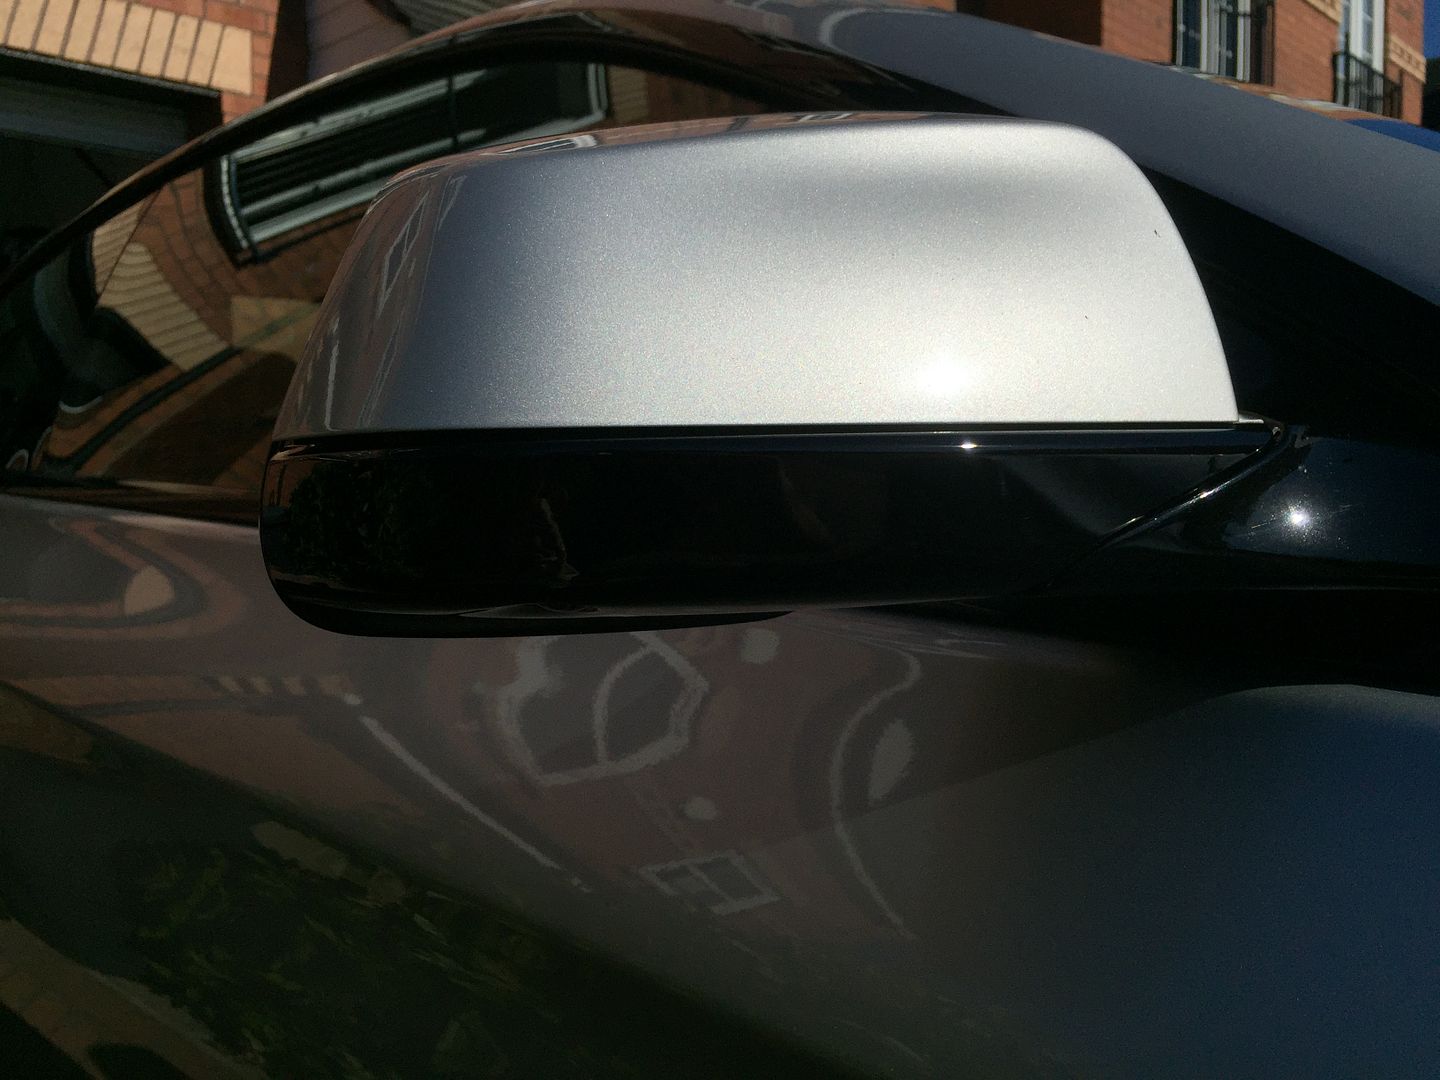 So, purchasing the trim needs attention as there are many different options available depending on your spec. I have the surround view. Looking at the back of the trim I could tell I'd need to remove the whole mirror casing to get to the front to remove some screws. All screws throughout that require removing are Torx 10. So, you first need to remove the mirror glass. This is easy, if a little daunting. Using a plastic trim tool beneath the lower outer edge, a little force to pull the glass forward and it pops off it's clips. Grasp the glass and remove remaining clips. Don't pull too hard as the glass has an electrical connector attached and not a lot of slack. 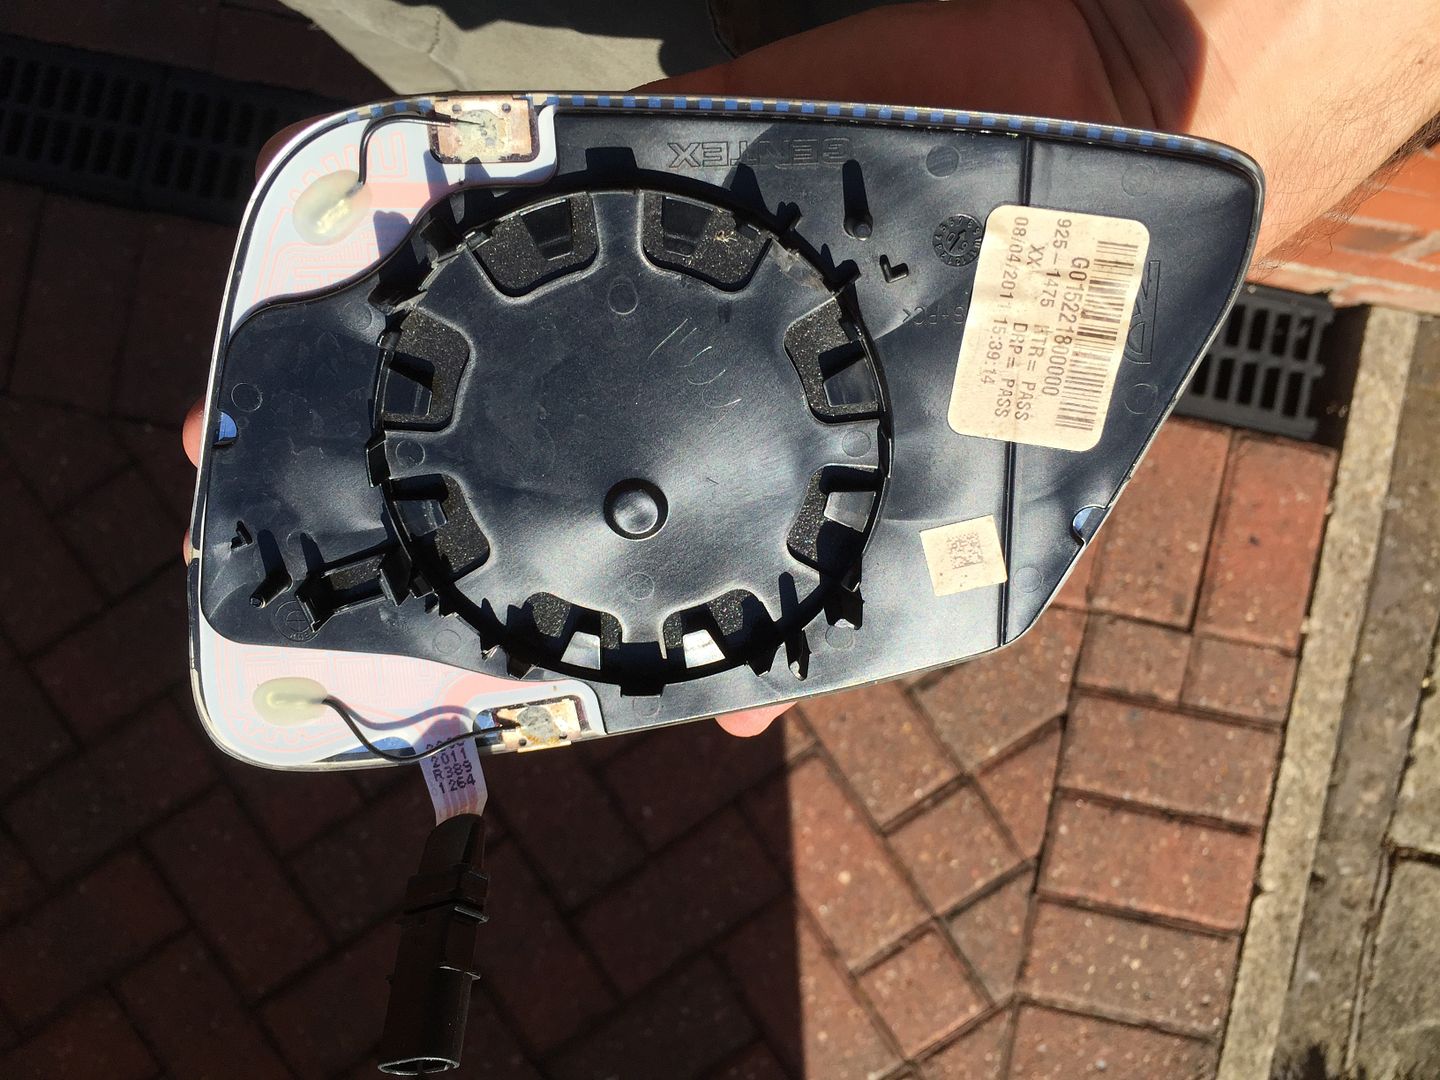 Detach the connector and the glass comes away. Store safely. You can now see the large round motor assembly. There is a single torx in the centre, then you need to wiggle it off it's blue connector, as shown in the pics. It's basically pull off push on, but it was stiff, so don't be worried about anything else holding it on, it will pull off cleanly with enough wiggling. Removing the 4 torx screws and you can remove the gloss black housing the mirror glass sits inside. Moving to the front side, the body colour mirror casing needs to be removed. Lots of tutorials say it pulls off, but they aren't clear in which direction etc. After removing mine I could see both clips had been previously cracked I assume from some DIY removal. Basically it comes off by lifting it directly upwards, not forwards. It slides down onto retaining tabs, so pulling forward simply breaks the clips on the mirror housing. You can see where my tabs have been cracked / glued etc. 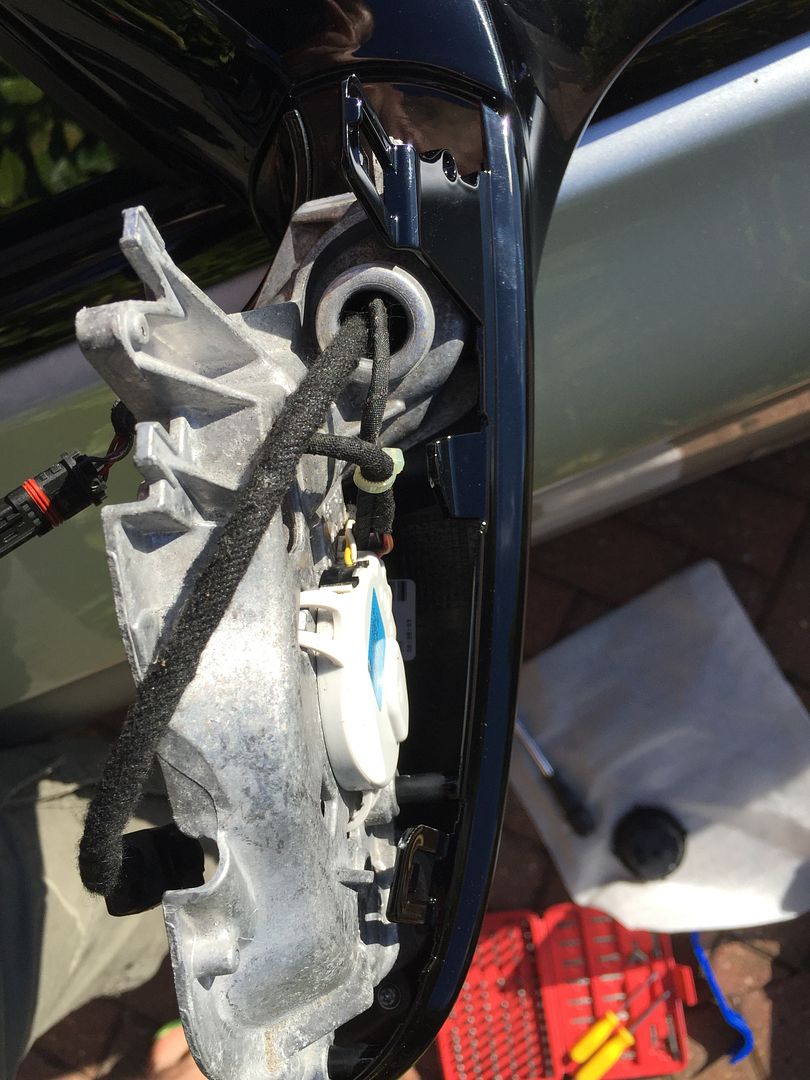 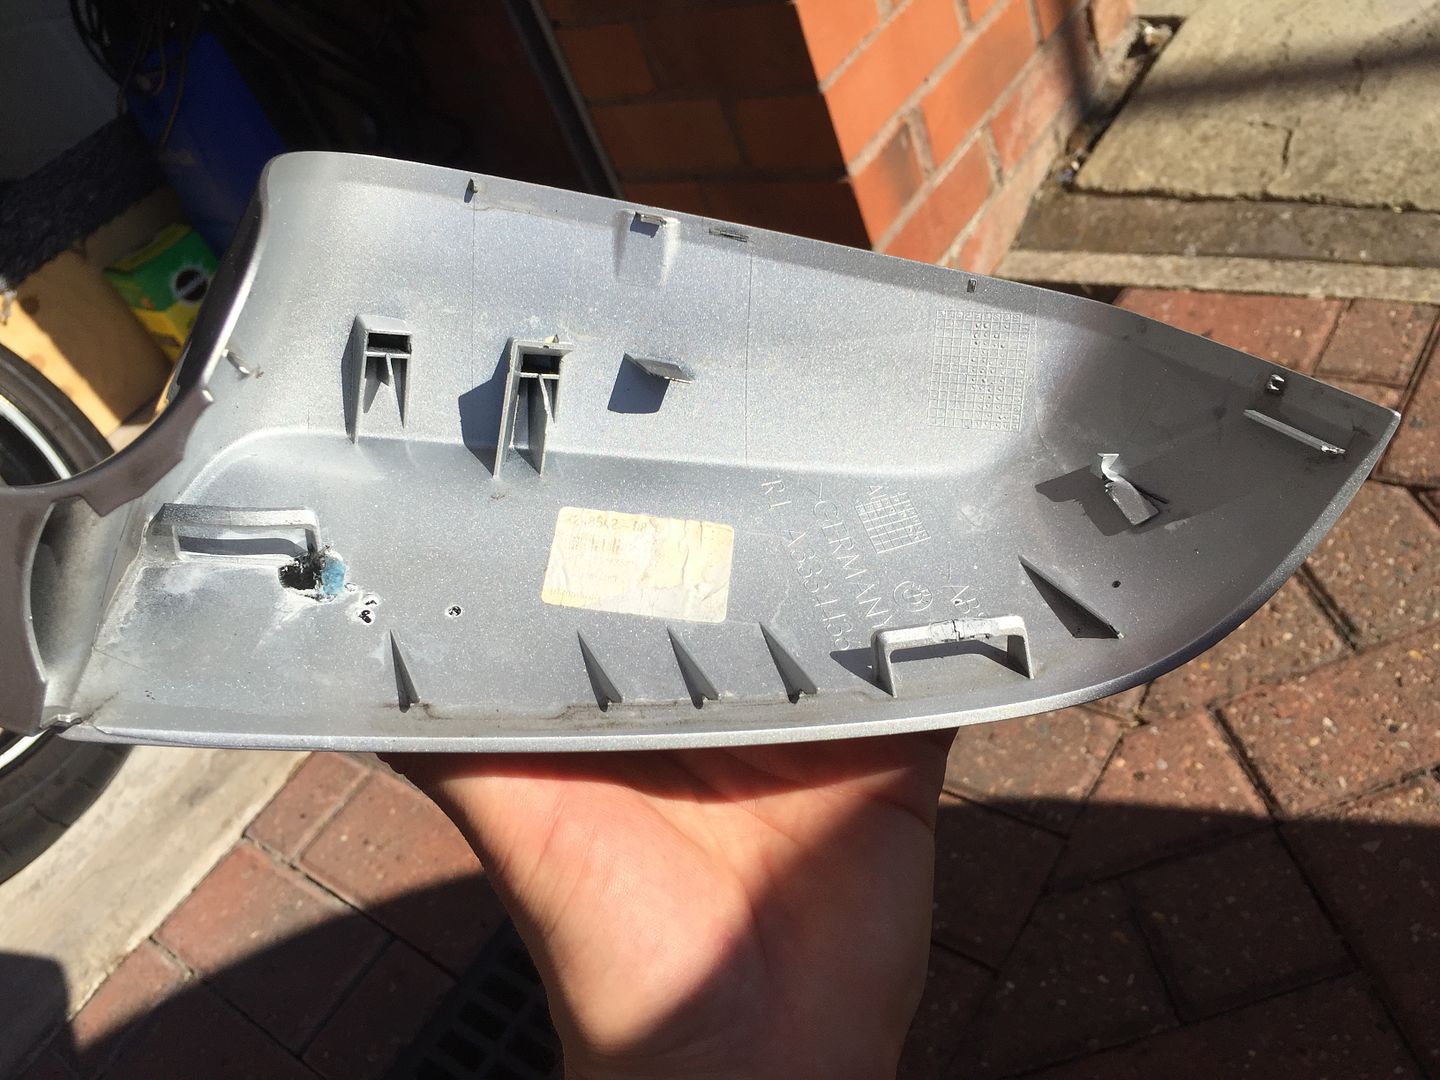 The lower trim can now be removed. Unplug the camera connector, unscrew the 3 torx screws holding it in place and it is in essence free. Due to it's shape and the way is slides into the mirror base housing, it is awkward to remove, but somehow easy to fit. If you have the camera you'll need to swap this to the new trim. It's nicely fitted with notches etc so no worries about lining it up perfectly. 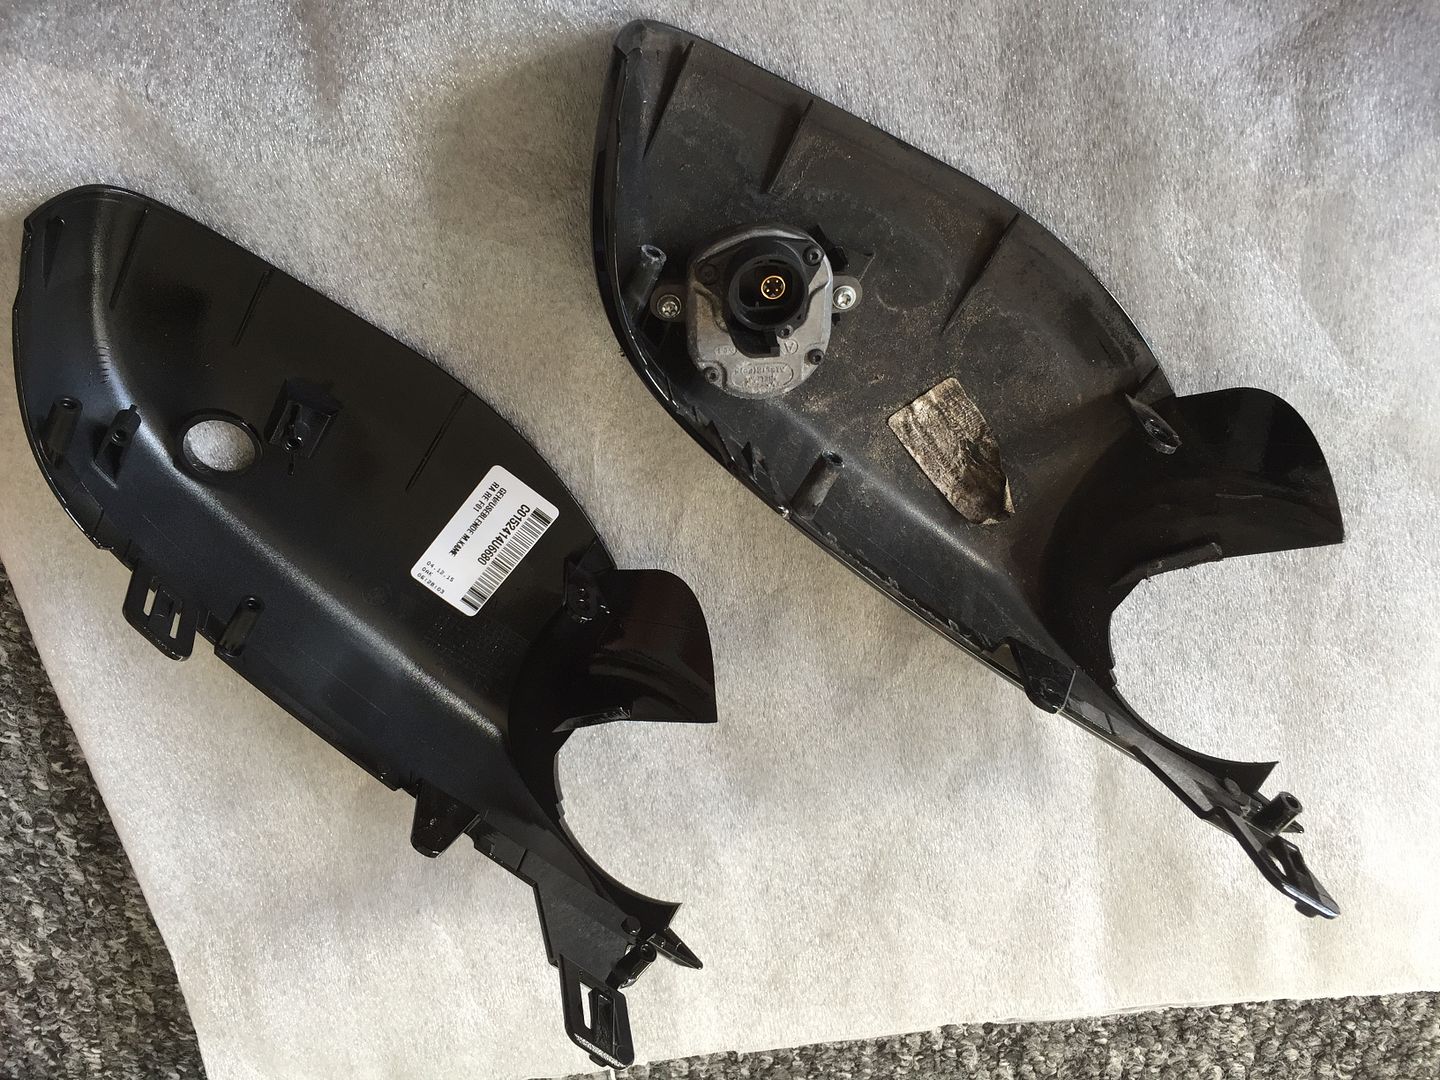 Fitting is the reverse of the above. Things to note. You can see a cable that gets in the way when refitting, and you want to be mindful to pull it up and forward so the new trim can easily refit, and not wedge the cable between the trim and the mirror base. 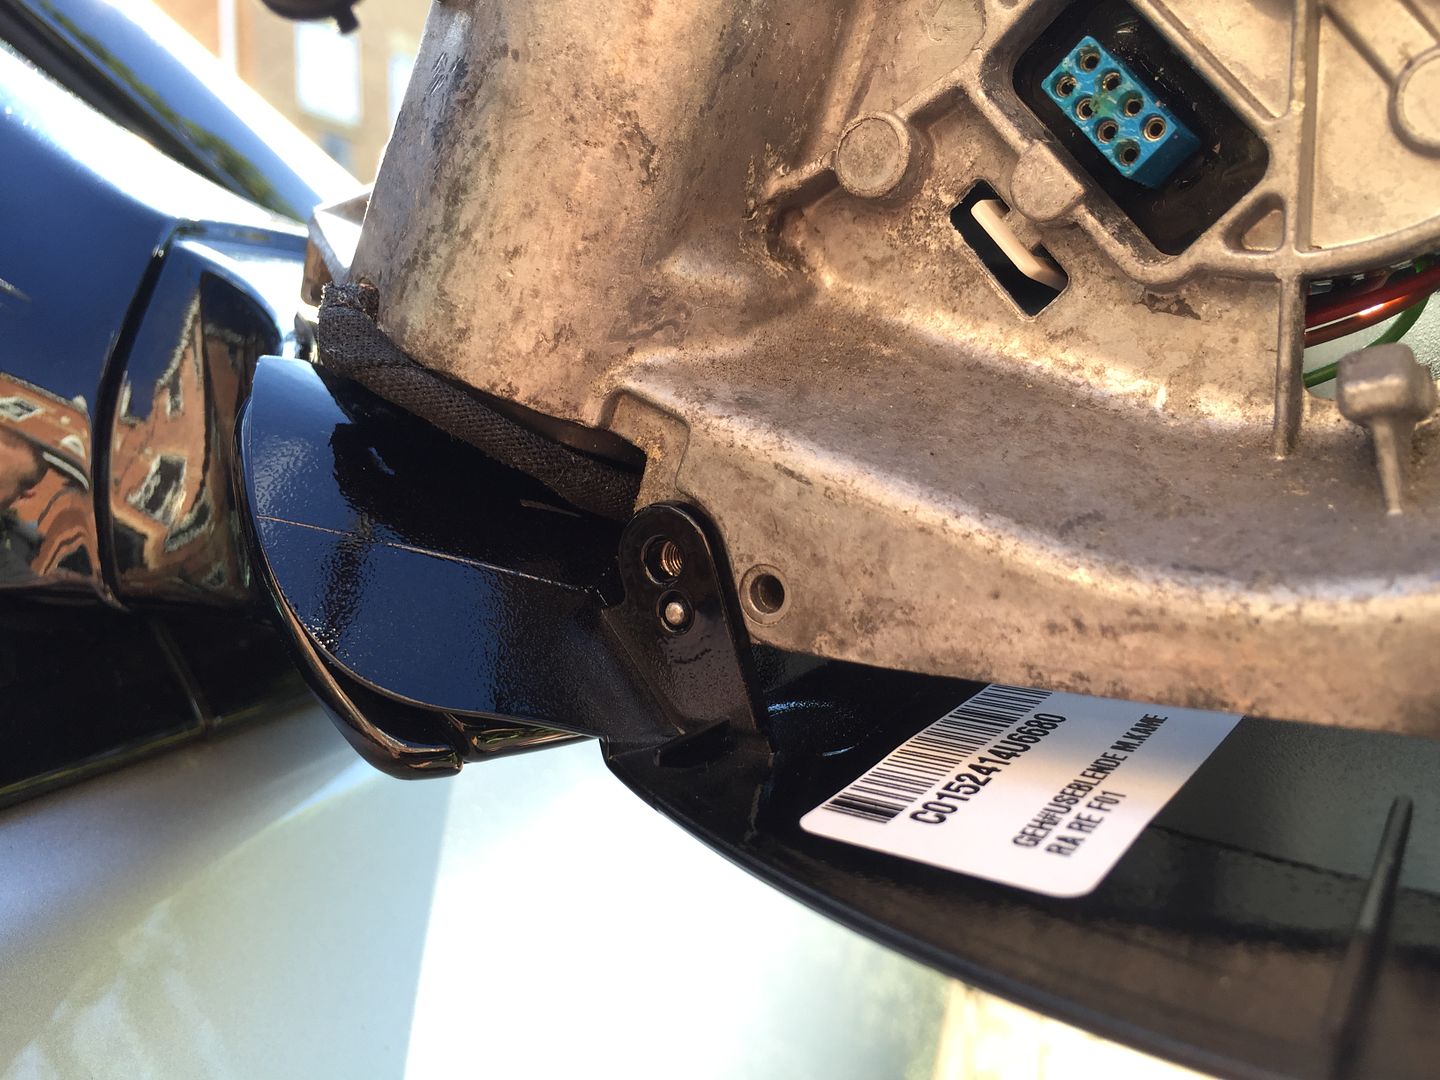 All in all it's an easy job when you know how each piece comes off, and how to get to each. Some condensed pics below in addition to the main pics above. 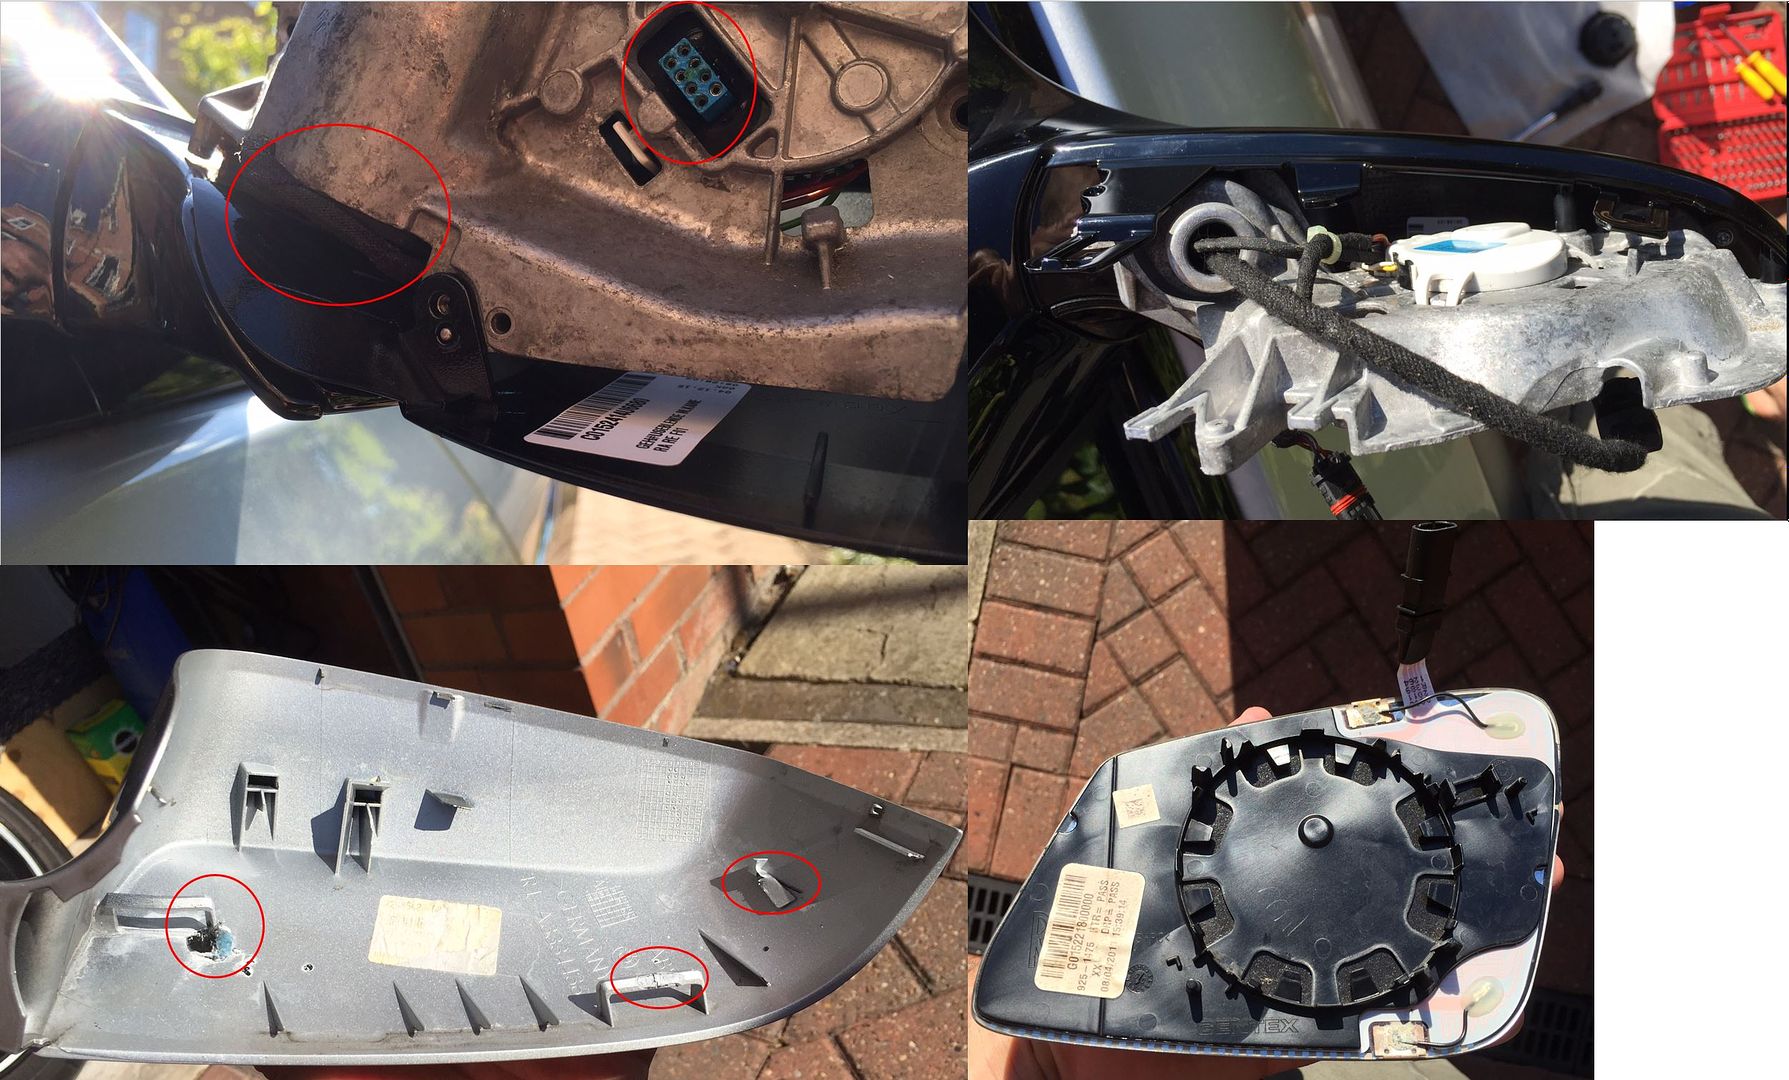 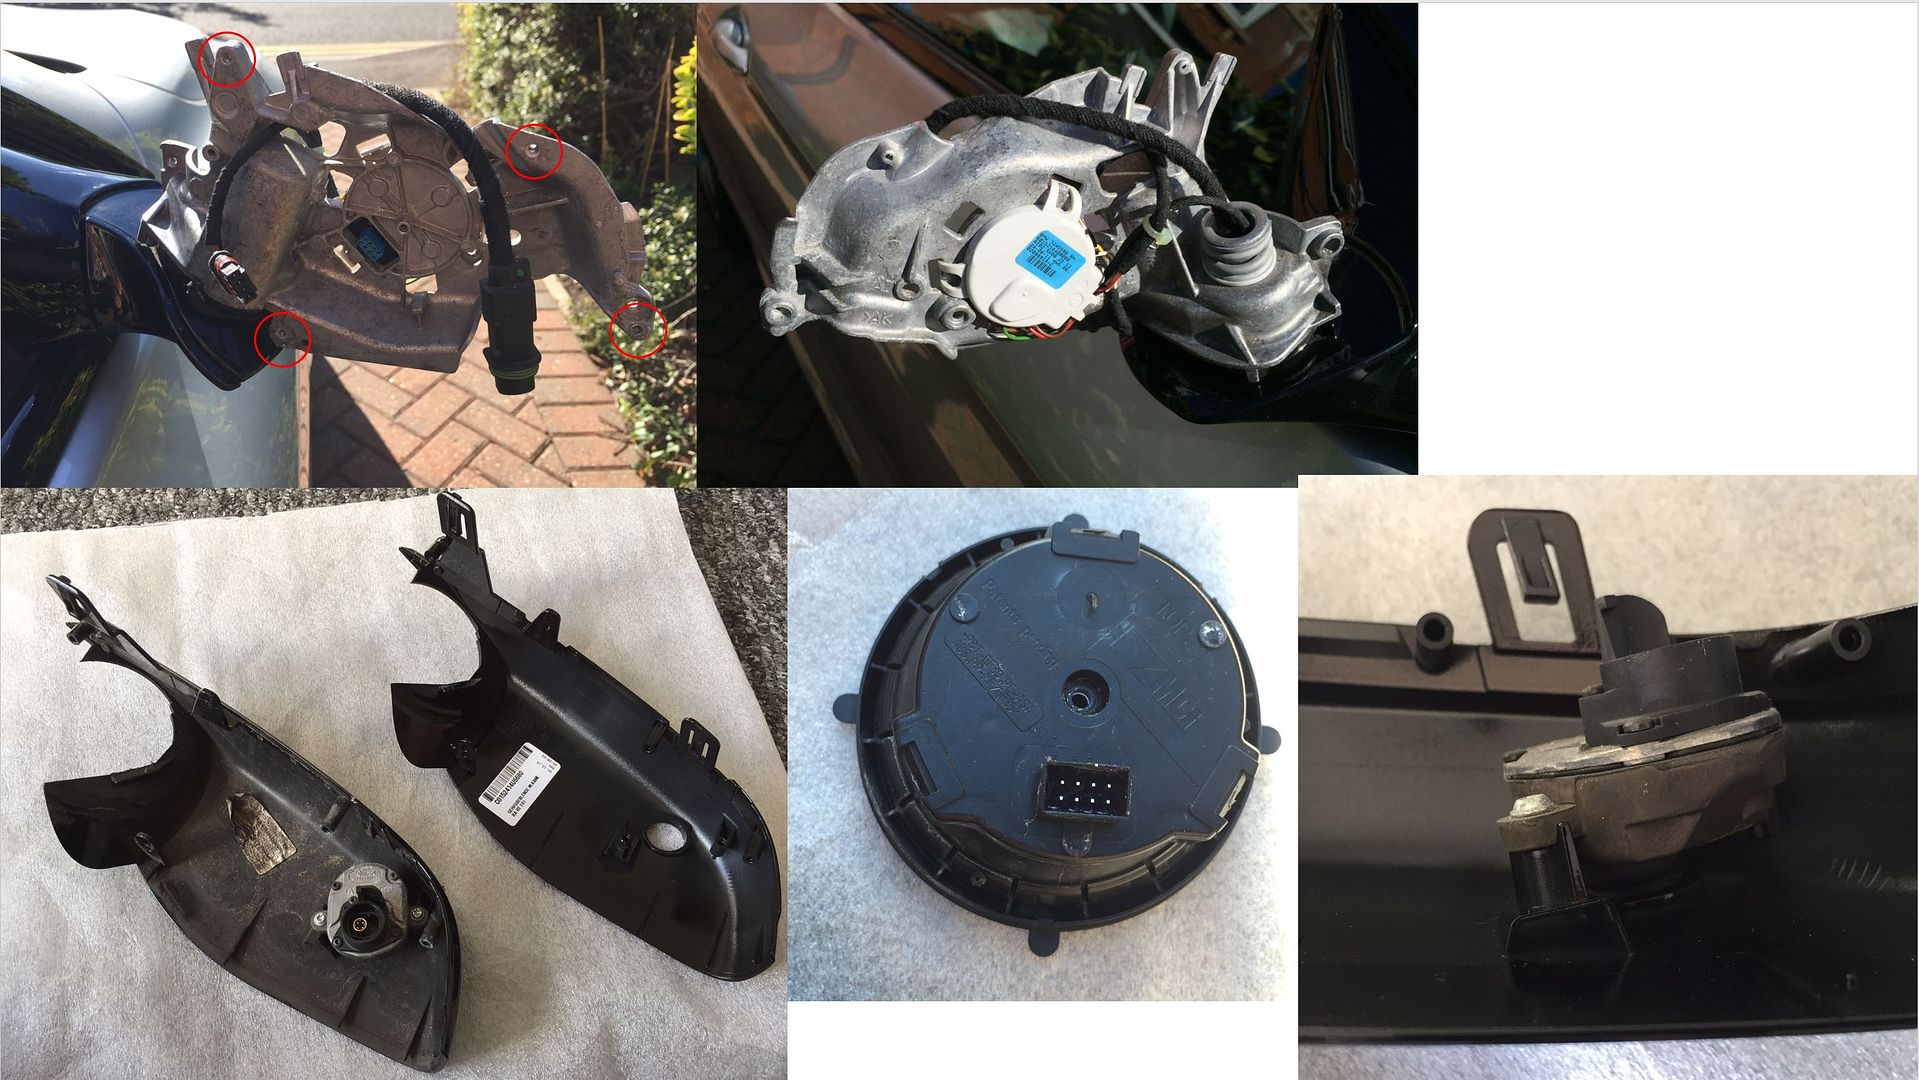 Hope someone else finds this useful. |
| 09-01-2016, 08:58 AM | #4 |
|
Lieutenant
   276
Rep 536
Posts |
Awesome wrote up, and just at the right time. I want to change the body coloured trim on mine for the CF trim - do I have to remove the glass or do I just proceed to remove the trim as per your guide?
|
|
Appreciate
0
|
| 09-01-2016, 03:28 PM | #5 |
|
Private First Class
 29
Rep 133
Posts |
No need to remove the glass, you should be able to lift the body coloured trim up and off with a bit of careful persuasion.
|
|
Appreciate
0
|
Post Reply |
| Bookmarks |
«
Previous Thread
|
Next Thread
»
|
|
All times are GMT -5. The time now is 04:56 AM.


